🍕 The Basics: How to Make a Great Pizza at Home
Whether you’re a weekend baker or just pizza-obsessed, making pizza from scratch is a skill anyone can master with a few fundamentals. Here’s a no-fuss, beginner-friendly guide to creating a delicious, crispy, chewy pizza right from your kitchen oven.
🧂 Ingredients (for a 12-inch pizza dough)
- 2 1/4 tsp (1 packet) active dry yeast
- 1 tsp sugar
- 3/4 cup warm water (100–110°F / 38–43°C)
- 2 cups all-purpose or bread flour
- 1 tsp salt
- 1 tbsp olive oil
Optional toppings:
- Crushed tomatoes, olive oil, garlic, oregano for sauce
- Mozzarella, basil, mushrooms, olives, pepperoni, arugula
👩🍳 Dough Preparation
1. Activate the yeast: In a medium bowl, stir together the warm water, sugar, and active dry yeast. Let this sit for 5–10 minutes until the surface becomes foamy. This indicates the yeast is alive and ready to help your dough rise.
2. Mix and knead: Add the flour, salt, and olive oil. Stir until a shaggy dough forms, then transfer to a floured surface and knead for 8–10 minutes until smooth and elastic. If using a stand mixer, mix on medium-low with a dough hook for 5–7 minutes.
3. First rise: Form the dough into a ball and place it in a lightly oiled bowl. Cover with plastic wrap or a damp towel and let it rise for 1–2 hours in a warm environment until doubled in size.
4. Optional cold ferment: For better flavor and texture, punch down the dough after the first rise and store it in the fridge for 24–48 hours. Cold fermentation develops complex flavors and gives a better chew.
🍅 Sauce & Toppings
Homemade Pizza Sauce: Combine 1 cup crushed canned tomatoes with 1 tbsp olive oil, 1/2 tsp salt, 1 minced garlic clove, and a pinch of dried oregano or basil. No need to cook—the sauce will cook on the pizza.
Cheese: Use whole milk mozzarella for that classic stretchy texture. For a gourmet touch, add fresh mozzarella slices or sprinkle in some grated Parmesan or fontina.
Toppings: Less is more. Classic options include sliced pepperoni, sautéed mushrooms, caramelized onions, fresh basil, roasted garlic, or black olives. Overloading can cause soggy crust.
🔥 Baking in a Home Oven
1. Preheat properly: Crank your oven to its highest setting (usually 475–500°F / 245–260°C). Let it preheat for at least 30 minutes. If you have a pizza stone or baking steel, place it on the middle rack to simulate a traditional pizza oven floor.
2. Shape the dough: Transfer your dough to a floured surface. Press it gently from the center outwards, leaving a thicker rim for the crust. Avoid using a rolling pin—you want to keep the air bubbles intact.
3. Assemble quickly: Place your shaped dough onto parchment paper or a floured pizza peel. Spread a thin layer of sauce, then add cheese and toppings. Work quickly so the dough doesn’t stick.
4. Bake: Slide the pizza onto your stone or baking tray. Bake for 7–10 minutes until the crust is golden and cheese is bubbling. Broil for the last 1–2 minutes if needed for extra char.
5. Serve: Let it rest for 1–2 minutes, then slice with a sharp cutter. Garnish with fresh herbs or chili oil if desired.
🧠 Extra Tips for Better Pizza
- Use bread flour or 00 flour for a chewier texture
- Chill your dough for at least 24 hours
- Add a drizzle of olive oil after baking for enhanced flavor
- Sprinkle a bit of cornmeal or semolina on your pizza peel to help with launching
- Don’t overcrowd with toppings—balance texture and flavor
🌲 Why Everyone’s Talking About Outdoor Pizza Ovens

In recent years, outdoor pizza ovens have become a breakout trend for food lovers, especially those who want to elevate their pizza game beyond kitchen limits. These ovens are now accessible, portable, and surprisingly user-friendly—making them perfect for backyard chefs, campers, and entertainers alike.
💡 What’s Different?
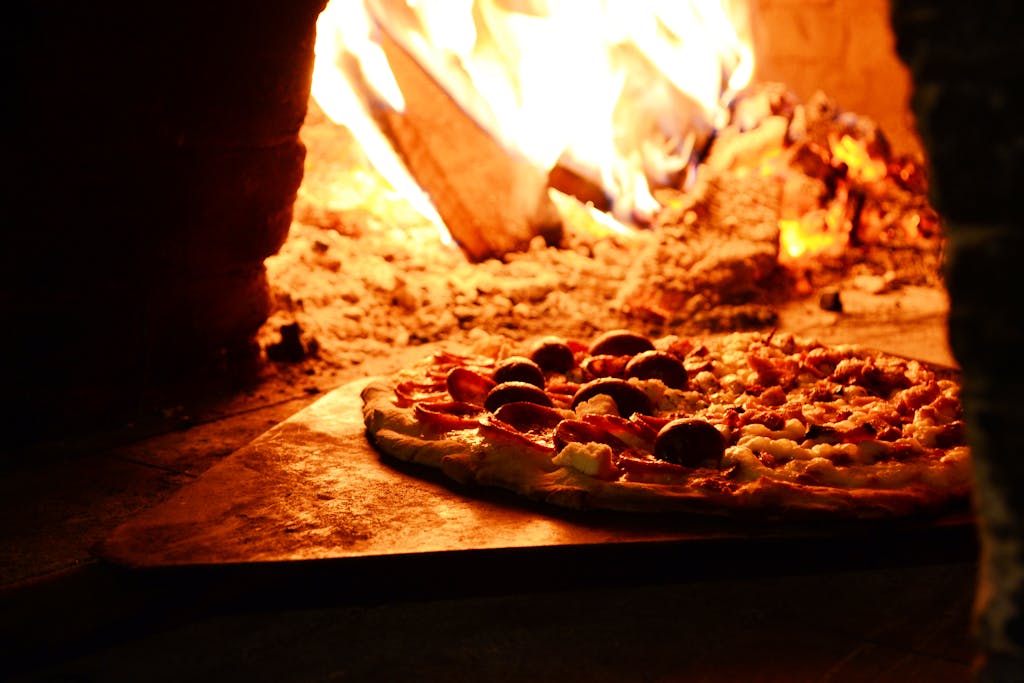
Temperature: Outdoor ovens can reach 850–950°F (450–500°C), almost double what indoor ovens offer. This leads to that famous Neapolitan charred crust in just 60–90 seconds. According to Lektowoodfuels, hardwood-fired ovens provide the consistent heat ideal for this style of baking.
Cooking style: These ovens typically use stone floors and dome-shaped chambers, which create ideal air circulation and radiant heat. The result: faster cook times, crispier crusts, and deeper flavor profiles. Firewoodoven.com also emphasizes the advantage of radiant heat retention in hardwood-fueled chambers.
Flavor: If you’re using a wood-fired model, the smoke adds another layer of complexity, infusing your pizza with authentic artisanal character. Love Logs explains how hardwoods produce cleaner, more flavorful smoke compared to resin-heavy softwoods.
Experience: It’s not just about the food—cooking outdoors is an experience. It’s interactive, social, and rooted in the tradition of fire-based cooking.
🔥 Types of Outdoor Pizza Ovens

- Flavor-rich
- Great for traditionalists
- Takes longer to start up and manage
2. Gas Ovens
- Convenient and quick
- Easy temperature control
- Clean and low-maintenance
- Combine wood, charcoal, and gas
- Offer flexibility for different cooking styles
- Ideal for food enthusiasts who love to experiment
🏕️ More Than Pizza: Versatility of Outdoor Cooking
Outdoor pizza ovens aren’t limited to pizza. With cast iron cookware and a little creativity, you can make:
- Sourdough loaves
- Garlic knots and focaccia
- Roasted vegetables
- Baked brie with herbs
- Flame-kissed desserts like fruit galettes or s’mores flatbread
Having an outdoor oven turns your backyard into a culinary playground.
🎯 Final Thoughts: Start Where You Are, Level Up Later
You don’t need fancy equipment to make great pizza—just quality ingredients, good dough, and a hot oven. But once you’ve nailed the basics, upgrading to an outdoor pizza oven can transform your pizza nights into something extraordinary.
Whether you’re staying in the kitchen or stepping outside to cook under the stars, pizza-making is about more than food. It’s about craft, creativity, and community.